How to lay a patio is a question that jumps on the minds of the DIY lovers. In this text, we will explain you step by step how the process is completed. Moreover, you will get information about the materials you can use for your patio project and what are the characteristics of them.

Before we continue, let’s explain what a patio is. The word is Spanish and refers to the inner courtyard. So, a patio is the outdoor paved area adjoined to your house, and generally, this area is used for dining or recreation activities. On the graph on the right are illustrated some benefits of having a patio. For more detailed insights, read our previous blog Benefits of Having a Patio.
Throughout our blog, we will be giving you tips and information about the 3 stages – pre-construction, construction, and post-construction of the patio. We will also be describing the 4 steps of how to install a patio during the 2nd construction stage.
PRE-CONSTRUCTION PROCESS
Before the patio installation begins, take into consideration the following. Most of them have to do with the decision on what materials are suitable for your space and style and the planning of the area.
AREA PLANNING OF YOUR PATIO
It is important to figure out where your patio should be. By drafting a plan of the area, it will give you a better understanding of how the area will look. On the drawing, you should include the patio and all the measurements and dimensions for surrounding landmarks.
In the decision making, pay close attention to drainage concerns which includes any run off from the patio edges and surface. Ensure that water will not lay on the patio. In case you install a pergola or awning, take into consideration whether you will also need downpipes or gutters for directing the water away from the patio .
The last part of the pre-construction process is to remove any nearby obstacles. Start by moving any existing furniture to storage space. Then, pull up any roots, lawn decorations, stumps, or small shrubs. Also, make sure that there is no debris or fallen branches on the ground. Finish by clearing a few feet beyond the area of your proposed patio-space to have more space to move comfortably during the construction.
CONSIDER THE COSTS of tools ans MATERIALS for your patio project
The tools and materials used in the patio laying are crushed gravel or paving base, levelling sand, shovel, hand trowel and tamper, and the paver stones of your choice. Additionally, circular saw or wet saw and slab specific blade, rubber mallet, an iron rake, a 1″ PVC pipe, flat board, garden stakes, marking paint, modified level, taping measure, straightedge and a garden hose. Optionally you can use jointing sand and landscaping fabric.
If you have decided to complete the project with the help of friends or even on your own, take into consideration the costs of renting the tools as mentioned earlier and the cost of materials. Also, consider the cost calculations for the days and hours that both you and your friends will work.
If you hire a professional patio laying team for the installation, it is essential to expect costs ranging between €60 and €170 per square metre from beginning to the end. There are several different factors that the price depends on these include access to the area, preparation work required, and the existing surface in the area. Additionally, the design of the area (steps, borders, and paths, etc.), the size of the area, and the paving material type you choose all affect the price.
Check our previous blog to get more information on Cost of Paving a Patio.
CONSTRUCTION PROCESS
With every type of landscaping work, to ensure a lifelong job, the preparation and installation procedures are very important. There are 4 steps in the installation process. The ground excavation is the first, 2nd is the laying of sub-base, then the laying stage and the last is the finishing touches. The construction process is described step by step below.
EXCAVATION PROCESS
Firstly, is the ground inspection and excavation to a depth of 5cm – 15cm. The depth depends on the consistency of the ground and if there were any previous driveways or patios there. The use of a tiller or makes the process easier as it looses up the soil and the digging process becomes faster. Alternatively you can use a mini digger, if you have digger driving experience.
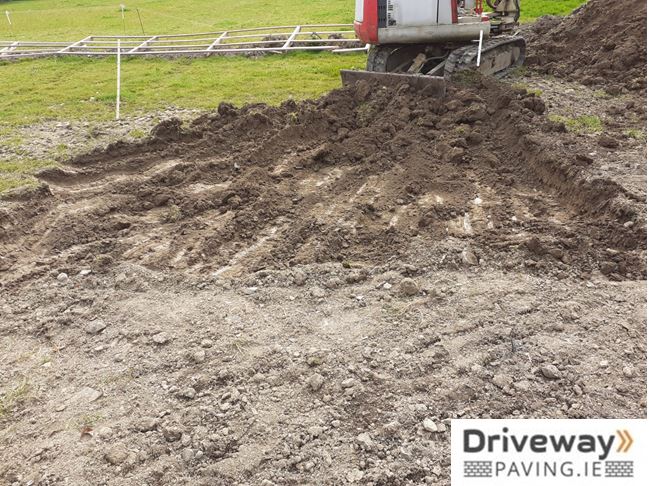
Also, attention must be paid to level the surface; any remaining soft area is removed and filled with compacted sub-base material. All this is important because if there are deeper areas than other areas this could lead into a pool of water which causes puddles of mud that must be filled in afterwards with gravel.
At the end of the excavation process, the dirt will be compacted. That is possible with a compactor machine or driving several times with a weighty vehicle over the area.
Important! Contact your local utility service before you start digging the ground. You must be sure that you will not hit any buried utility line. This way, you prevent accidents and power outage for you and your neighbours.
LAYING THE SUB-BASE
After you have excavated your area and decided your paving layout, it is time to start with the preparation of the patio base.
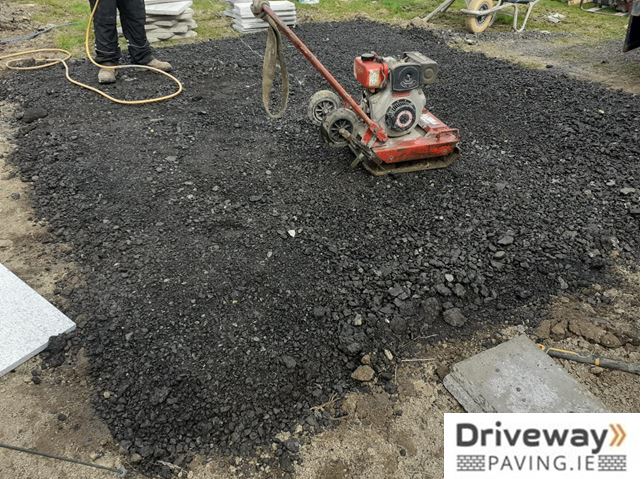
The sub-base is the 1st layer, and its use is to support the whole construction. The sub-base is layered with 75-100mm of hardcore crushed stone or concrete.
The hardcore should be levelled out and spread out evenly to ensure that it flows downwards towards your drainage channel or garden. For the patio to sit correctly and below the level that you want you must compress it with a vibrate compactor plate up until it is down to 50-75mm.
For stability of the slabs, you must lay them on a bed of mortar. By mixing 4-parts of sand with 1-part cement, and then add the water, bit by bit, you make the mortar. Be sure that the mortar is damp and has a regular consistency and is not runny.
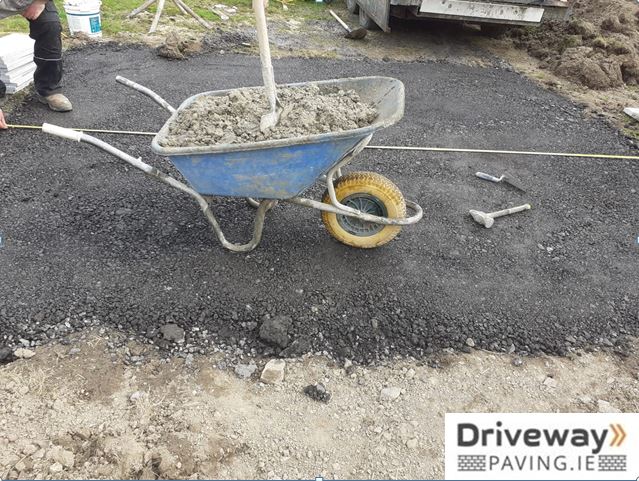
After creating the mortar, spread out the mortar evenly and use a trowel to level it out. To enable the slabs to sit 6-10mm high when positioned in place, the bed of mortar must be thick at least 30-40mm.
PLACING AND SECURING THE SLABS
Paving the slabs of your choice is the last layer of your project. Start by placing first the slabs that closest to your house (a straight edge). Otherwise, start from the side that you will need to step the less as your construction is under progress.
Guide yourself with a piece of string and tap down each slab with a rubber mallet. Beneath the mallet you should put a chunky piece of wood as this will protect your slabs from any cracking while tapping them down.
Keep in mind that between the slabs you should put an 8-15mm gap.
During the whole process, ensure that while you are working that you do not put your feet on the slabs accidently. You must create a surface that is even and to check that the slabs slope you should use a long spirit level.
FINISHING TOUCHES FOR YOUR PATIO
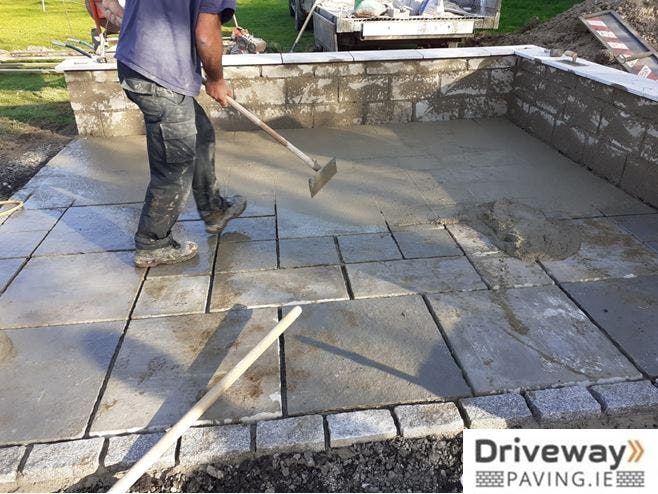
One day after, you do the jointing that prevents the slabs from moving. During this process, once the bed has set, then the gaps should be filled with mortar.
You can make the mortar by mixing a cement – 1-part cement and 3 parts sand, add a bit of water – or just use a sticky jointing compound from the market (saves time and mess but not as long lasting in certain applications).
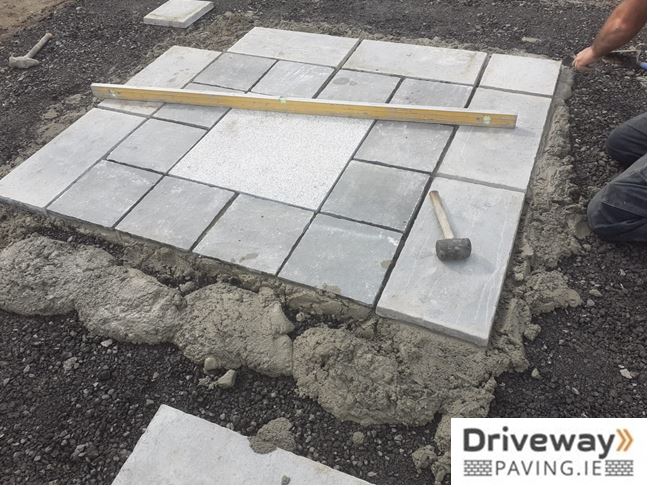
Between the dry slabs push the cement mortar using a trowel in the gaps, compact it, and then use a pointing tool to smooth it out. Otherwise you can use the wet pointing method in the photo below where the mortar is thinner and brushed into the joints. Then the excess is washed off the slabs.

POST-CONSTRUCTION PROCESS
Patios can last for decades and with the right clean up and maintenance, they can always look like recently installed. Below you will find useful tips on how to achieve this.
CLEANING UP
You should brush your patio; this will remove any dirt and debris that is sitting on the surface. In this way, you prevent any seeds from germinating. Also, brushing prevents small weeds that just started sprouting from growing any further.
Something that can bring even more amazing results is to add floor cleaner in the water while brushing. Check thay the floor cleaner doesnt contain any acid as that might react and damage some concrete or stone surfaces. You can alao purchase stone cleaners specifically for the type of stone you lay in your patio.
Afterwards, the slabs must be washed down and always make sure that any splattered mortar is removed before hardening and staining the paving.
Any gaps should be filled between the paving slabs with a pointing trowel and use the initial mortar mix and be careful not to get mortar on the slab surfaces.
MAINTAINING
Removing weed from your patio is the best way to maintain it longterm. Weeds on your patio occur because of not brushing often, and of course, is a matter of time. While removing them, make sure that you remove the whole roots or as much as possible of it.
Instead of doing it manually, you can use weedkillers – the best options are the contact or systemic ones. Read the manufacturer’s instructions in terms of when and where it can be used, especially if you have children and pets around.
Generally, always keeping your area clean and tidy is the best solution for a weed-free patio. Make sure to clean up carefully your patio, especially after having a meal there or after doing gardening work as grass cuttings and compost sitting in corners of your patio are perfect for seeds to start germinating and growing weeds.
