Gravel driveways, thanks to its numerous advantages, are one of the most popular solutions in Dublin and the whole country. One crucial benefit of a gravel driveway is that its installation process is shorter compared to other driveway solutions. In some cases, if there is some construction experience, the right equipment, and time available, then gravel driveway can be a DIY project.
In this blog, we will give you information and tips about the three stages – pre-construction, construction, and post-construction – of a gravel driveway. Also, we will describe in detail – the four steps of gravel driveway installation during the second stage (construction).
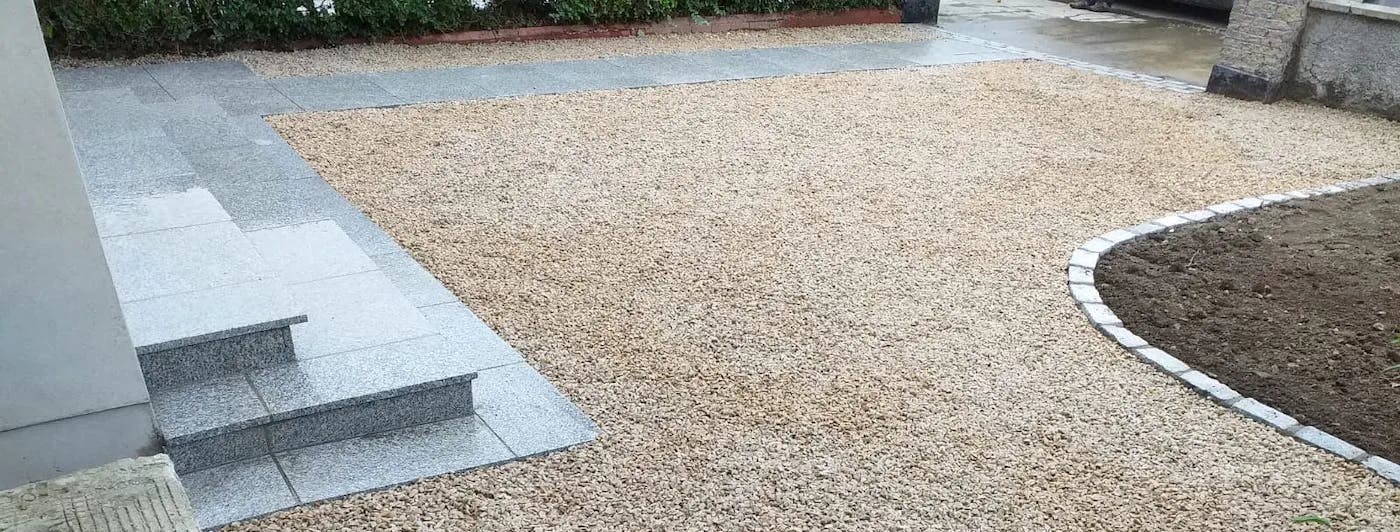
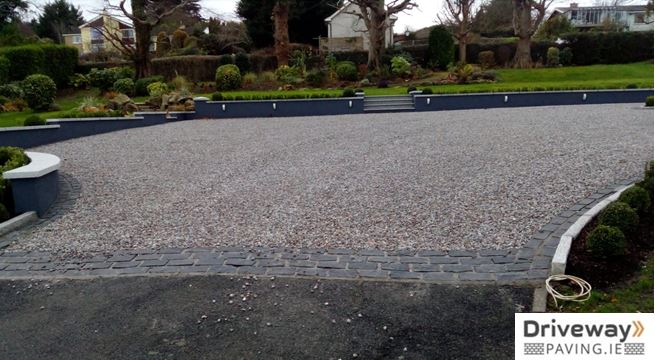
Here, you can have a look at some of our gravel driveway and patio constructions in Dublin.
pre-construction process of a gravel driveway
Before the installation of a gravel driveway, there are some things to consider. Most of them have to do with the planning of the area and the decision about what materials are suitable for your style and space.
Planning the area
The first thing to determine is where your driveway should be and if you want it in a circular form or just as a passing and parking space for your vehicles.
While making your decision, you should pay attention to the slope of the ground and if there is any drainage issue. That is because a crucial point on the driveway construction is that the water will run off the sides and not fall towards the middle of the driveway.
Moreover, you should mark and measure the area of your future driveway and decide whether you want to have edging border on your driveway or not.
Materials and costs of gravel driveways to consider
The materials and tools used during the gravel driveway installation are landscape stakes, string, thick gardening gloves, wheelbarrow, shovel, rake, weed barrier, and of course gravel. Additionally, a mechanical compactor will be needed to press the dirt and rocks, and a backhoe or tractor for the excavating process.
If you decide to do the project on your own or with the help of friends, then you should calculate the cost of buying the materials and renting the tools as mentioned earlier. Also, it should be considered in the cost calculations, the hours or days that you and your friends will work on it.
By hiring a gravel team for the installation, you should expect costs to range between €55 and €85 per square metre, from start to finish. That price depends on factors such as the existing surface in the area, preparation work required, and access to the area. Furthermore, the size of the area, design of the area (borders, paths, steps etc.), the type of gravel you choose, and the amount and type of vehicular traffic the area must endure are affecting the quotation.
construction process of a gravel driveway
As with all types of hardscaping, the preparation and installation process for gravel driveways is very important to ensure a lasting job. Four are the steps for gravel driveway installation. First is the excavation of the ground, second the installation of the geotextile membrane, then the laying of the sub-base material, and finally the laying of the gravel. Below, we will describe you step by step the construction process.
Excavation process
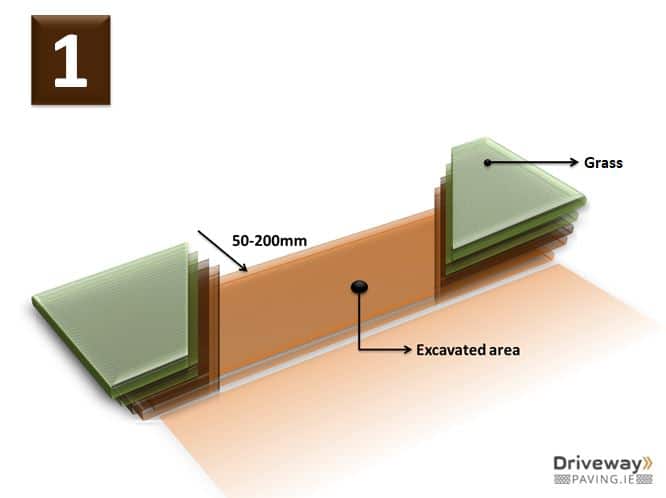
Firstly is the ground inspection and excavation in-depth 5cm – 20cm. The depth depends on the consistency of the ground and if there were any previous driveways or patios there. The use of a tiller makes the process easier as it looses up the soil and the digging process becomes faster.
Also, attention must be paid to level the surface of the driveway; any remaining soft area is removed and filled with compacted sub-base material. All this is important because any areas that are deeper than other areas may later lead to water pooling and cause mud puddles that have to be filled in with more gravel afterwards.
At the end of the excavation process, we should compact the dirt. That is possible with a compactor machine or driving over the area several times with a heavy vehicle.
installation of the geotextile membrane
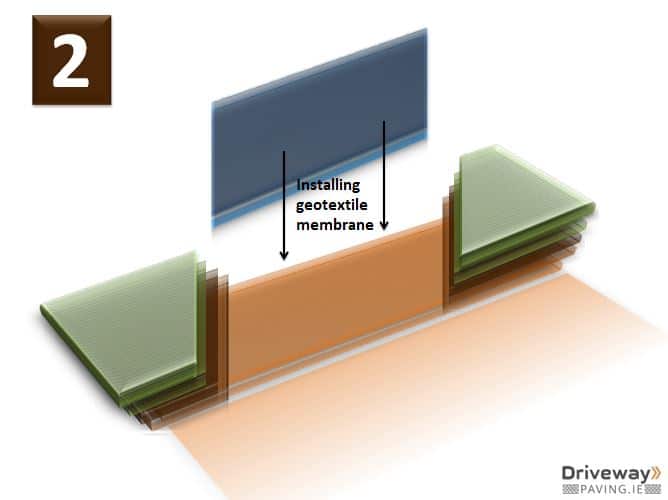
In the second step, the geotextile membrane should be placed between the excavated area and the sub-base. The reason for laying a geotextile membrane is to help prevent weeds from growing through the pebble after installation. Also, to prevent the soil binding to the base stone, which could affect drainage negatively in the future.
The amount of the weed barrier should cover completely or exceed the surface of the driveway.
One more function of the geotextile membrane is to separate the sub-base material with the ground and to allow the passage of the water. That is essential, especially in areas where the ground conditions are poor.
laying the sub-base material
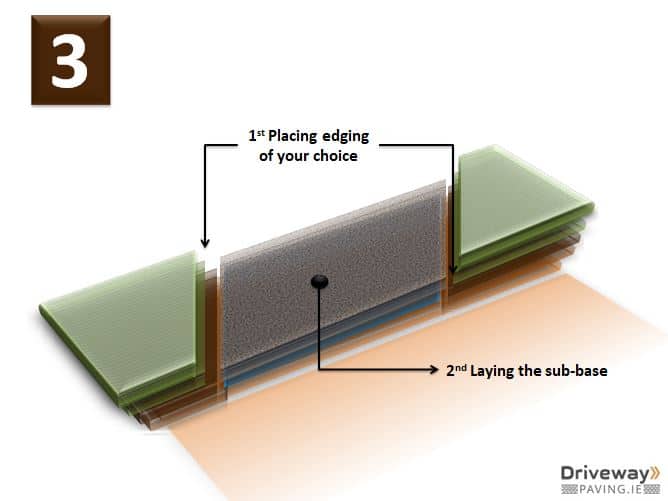
The third step includes the laying of the sub-base and is the most crucial part of the driveway construction. The sub-base helps to spread the weight of traffic from above and creates a solid layer resistant to rutting and channelisation. This defines the load-bearing ability of the driveway.
Depending on the size of vehicles using the driveway, its depth varies from 10cm to 15cm.
The consistency of sub-base is crushed rock graded from 40mm down to dust. Different sizes ensure that the material interlocks when compacted while still remaining permeable to water. In countries like Ireland, where the flooding issues become more prevalent, that is of high importance.
All sub-bases should be installed in thin layers and compacted with a vibrating roller or wacker plate to ensure full compaction throughout the sub-base layer.
Finally, on this step can be placed any desired edging that can work as a visual border, and creates a barrier between the driveway and lawn.
laying the gravel
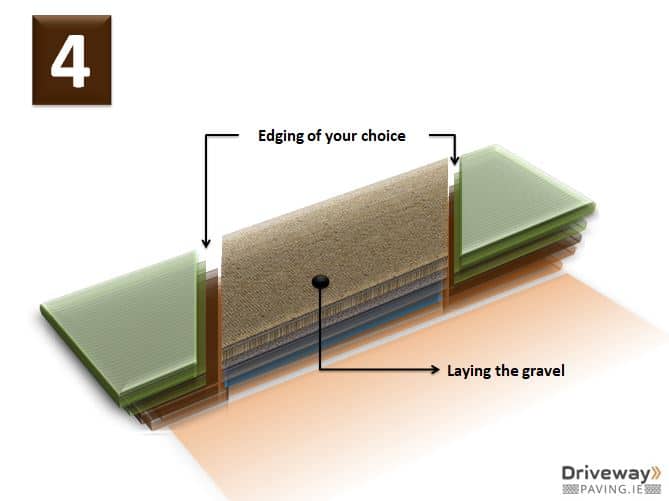
Laying the gravel, that is the complete process, can be considered as the easiest step compared to the previous ones.
The purpose of the gravel is to give a decorative finish to the driveway, and its laying should not be too deep. An excessive quantity of gravel increases the cost of the project and the time for its completion. Also, it does not benefit the performance of the finished driveway. For these reasons, the depth of the gravel should be between 3cm and 4cm.
Important to mention is that the size of the gravel should be around 2cm. Smaller than 1cm dimensions could get stack in car tyres and is better to avoid.
At last, the area should be graded in such a way that gravels peak in the middle of the driveway and incline slightly to the sides. The middle part should be by 2% to 5% higher than the sides. This structure helps to promote water drainage.
post-construction process of a gravel driveway
Gravel driveways can last over decades and with the right clean up and maintenance, they can always look like recently installed. Below you will find useful tips on how to achieve this.
cleaning up the gravel driveway
Your gravel driveway can be kept clean and looking its best with just a little bit of regular maintenance.
The following should keep your gravel driveway looking pristine:
- Removing leaves in Autumn – This is especially important if there are overhanging trees in the vicinity of your driveway. You can rake, pick up or use a blower to remove leaves and debris, particularly in Autumn when debris will be plentiful from trees and bushes.
- Raking the surface – in order to keep your gravel driveways smooth and level, some light raking of the surface will be required. Pay particular attention to areas where the car wheels often pass or that experience regular foot traffic.
- Monitor and repair potholes. Over time and with regular traffic, potholes could form in your gravel driveway. Once established, they fill with rainwater, and further erosion occurs deepening the pothole. As soon as you see one forming, you should rectify if to prevent worsening. If it is in the surface layer of the gravel simply raking it back, the level should suffice. If it is more in-depth and into the base layer, you may need to add some hardcore, compact it and then add more gravel on top. You should be able to prevent these deeper potholes with a bit of upkeep and raking.
- Replenish gravel as needed – Over time with regular driving and wear you may find you need to top up your gravel. Gravel driveways are very easy to replenish as you buy a small amount of your chosen gravel and spread it on the surface and rake it in. This will keep your gravel driveway looking fresh and new.
- Control weeds – reasonable weed control will help keep your gravel driveways looking its best. If you follow the previous steps on removing debris and raking, you should not have too many weeds. For the few weeds that do manage to make their way into your driveway, hand pulling them is an effective way to maintain your weed control. If you have neglected your gravel driveway for a while and weeds have gotten out of control, all is not lost. Spray a good weedkiller to kill off the weeds. Once dead and wilting you can rake them off the surface of your driveway. If you have many overhanging trees, shrubs and flower beds surrounding your gravel driveway your driveway may be more vulnerable to weed infestation. In these instances, we recommend spraying a suitable weedkiller once or twice a year as a preventative measure as an addition to your regular maintenance routine.
maintaining the gravel driveway
With proper installation of the base in the first instance, there should be the minimal sinking of your gravel driveway. If some sinking occurs with time, it is easy to rectify. If the sinking is only 1cm to 2cm, we recommend topping up the area with new gravel to bring it back to the desired level.
If the driveway has sunk by more than 2cm its best to remove the top layer of gravel (keep it to one side for later), install more hardcore and compact it well, then reinstall the gravel you had set aside on top of the newly laid hardcore to bring the level back to the desired level. By replacing hardcore rather than just topping up the gravel you prevent the gravel layer being too deep and causing the problems such as the sinking of car tyres and difficulty walking of the surface.
If you want to learn more about gravel driveways, then read our FAQ page, where more information can be found.
